Sunday 31 October 2010

Boo!

Randolph the Pumpkin and Steve the Ghost would like to wish everyone a very happy Halloween!  (As would Nick and I of course)

xxx 

Sunday 24 October 2010

Candy Corn and Candied Corn


Halloween- one of my favourite holidays, and one that I feel is severely underrepresented here in the UK.  So much so that when I brought in a bag of 'candy corn' to work (albeit not necessarily the crème brulee of sweeties, but certainly one I love and get an undeniable hankering for around this time of year) sent to me by some lovely friends stateside,  everyone looked at the bag with a puzzled look on their face.  We are talking about people in the food industry, people with professional patisserie training and extensive ingredient knowledge- all with a blank face and a bit of hesitation to try to the tri-coloured gem.  Oh what they have been missing!  Not that I was ever allowed to eat more than a handful each Halloween season as a kid, but that handful represented the jack-o-lanterns, the costumes, the trick-or-treating; all the great stuff about the end of October when you're a kid.

In homage to my many Halloween experiences as a child, in attempt to give a bit of that experience to some of the unknowingly deprived British children here, and to try to use up some of the boatloads of candy corn now graciously in my possession I decided to make popcorn balls with candy corns.  These little balls are a bit gooey and sweet, with a touch of salt from the popcorn, and always always leave a trail of crumbs when you eat them!  They are fun to eat and actually really fun to make- so don't be afraid to dig your hands into the melted marshmallow mess as you roll them together.  I didn't have to actually eat one to feel a bit of the child-like excitement and anticipation that comes with Halloween- making them was enough!  That doesn't mean I'm not saving one for later though, don't be fooled....

Adapted from 'Cooking Light' (no joke)

¼ cup butter
8 cups popcorn (I did mine on the stove to make it slightly healthier but microwaved is fine too)
8-10oz/ 200-300g marshmallows
a good sprinkling of salt
1 cup+ candy corn

Method:

Make your popcorn.  I made mine by coating a medium sized pot with sunflower oil and heating it over the stove, making sure to coat the entire bottom and onto the sides.  Then add 100g corn maize kernels and cover with a lid, lightly shaking the pot from side to side.  Continue to shake the pot while the corn pops (you can hear it- it's very exciting!) - this not only helps the unpopped kernels to cook, but also keeps the freshly popped corn from burning.  You know the corn is popped when you can no longer hear or feel many raw kernels, and when there is a lull of 5 or more seconds.  Transfer your popcorn to a large bowl and sprinkle generously with salt.  Next add your candy corn to the bowl, taking care not to let them all sink to the bottom.  You'll want them spread evenly throughout your mix if possible.


In a small saucepan, melt your butter and marshmallows with a dash of salt over a low flame, stirring periodically as it begins to melt.  Do not allow it to bubble.  Once fully melted remove from heat and pour the melted mixture over your popcorn.  Mix thoroughly trying to evenly coat all of the corn.  Let cool for 5 minutes.

Line a baking tray (or two) with grease proof paper.  When your mixture has cooled, spray your hands with cooking spray first, then take a handful and squeeze the mixture together to form balls slightly smaller than tennis balls.  The marshmallows will work as glue allowing you to press tightly to form compact balls.  You may have to respray your hands every couple times, as the mixture is incredibly sticky!  Leave to dry/set on the baking tray for 30 minutes or so.  Then wrap the balls individually in clingfilm and give away as soon as possible (they probably will only keep for about 3 days or so) to anyone in need of a bit of Halloween cheer, perhaps reminding them about good dental hygiene as these things will certainly stick in your teeth... in a good way of course!

Monday 4 October 2010

What to do with a fridge full of yoghurt....

Yoghurt or yogurt, however you choose to spell it I had a ton of it in my fridge!  Some of you may have already seen this picture I posted on Facebook.


Since stepping into the blogging world I have joined a couple of networks/communities, an anthropologists dream to analyse in and of themselves!


One of the interactions bloggers can have with each other is product sampling, when a representative of a product will offer you free goodies in exchange for your opinion, good or bad, and a bit of ingenuity to come up with interesting ways to use said product. Some bloggers frown on others who participate in this, thinking it takes away from the intention of the blog, that it no longer allows the blog to be entirely self directed etc. And in some cases those people are probably right. Thing is, who can turn down the opportunity to get their entire fridge filled with delicious yoghurt for free?! Um, not me.


So here's what I've been up to with my goodies: 

I started by marinating chicken in yoghurt and harrisa paste, then grilling it and placing it on an impromptu stew of aubergine, tomatoes and beans with a touch of cumin and chilli.


Then I made yoghurt cheese by keeping a large serving of it in a muslin cloth overnight in the fridge to drain. I preserved it in oil and lemon juice and plan to spread it over some delicious bread with tapanade and a few marinated artichokes.


I've done a lot of adding a big dollop to my oatmeal at the very end right before I eat it. I haven't photographed it but you can imagine what that looks like...


Lastly I made a 'green goddess' dip with avocado, chives and parsley and served it with veggies and toasted three seed chips.


My yoghurt has certainly served me well so far, and I know of a few brilliant muffin and cheesecake recipes that will see me through my last two tubs. That stuff just lasts forever! You should really buy some! It doesn't have to be the brand I used necessarily, though if they offer to fill up your fridge I certainly wouldn't kick them out of bed....

Sunday 19 September 2010

Like Putting on a Sweater Made of Hugs...


That is what this food feels like for me.  It's cozy and warm and reminds me of home during my favorite time of year when apples and butternut squash are at their best, and you can justify sprinkling cinnamon and nutmeg on anything.... This Sweet Vegetable Casserole I made this morning is what my mother originally started making during Passover- a holiday filled with strong memories of my Grandpa.  Memories which I am putting on like a sweater to keep me warm....

Passover is probably the most important Jewish holiday after Shabbat.  It is the holiday that tells the story of the Jews exodus from Egypt and slavery (and into that whole wandering for 40 years- but conveniently the holiday doesn't focus on our directional ineptness...) and celebrates the coming of spring.  Passover sedar is the dinner during which the story is retold from the haggadah with ritualistic eating and drinking.  If you're Orthodox the sedar can take FOREVER and is mostly in Hebrew.  Lucky for me I grew up in a reform temple, so my mother and I felt at liberty to edit our own version of the story to include women (consistently left out of many of the well known biblical stories and prayers), English, and modern day relevance (Intollerance and poverty is something I can wrap my head around a lot more than locust or frogs). 

During our Passover sedars Grandpa often led, Mom and Grandma cooked, Dad and Roger took turns downing a glass of wine to represent 'Elijah', Debbie made her marinated mushrooms, and Ellen and I sang the four questions and hunted for the afikoman (for which we were rewarded with money or the promise of pierced ears by Grandpa).  But most importantly, we all ate (a lot) relaxed, and enjoyed each others company.

This recipe makes a fabulous sweet side dish, could work well for breakfast or dessert or for absolutely no other reason than the desire for the taste of the season and of home.  Make it and you'll find that sweet memories are baked right in.

Bebe's Sweet Vegetable Casserole

1 cup grated raw sweet potato or butternut squash*
1 cup grated raw carrot
1 cut grated raw tart apples
1/2 cup sugar
1 cup flour or matzoh meal
1 tsp salt
1 tsp cinnamon
1 tsp nutmeg
1 tsp baking soda

*If you're using butternut squash you can roast off all that you don't use (which is most of the squash) in the oven like I did in the photo above*

Feel free to use a bit more grated veg or spices if you have it...

Directions:

Grate all fruit/veg and mix together.  Add your spices, soda and flour and mix well. 

Grease a 9" or 10" baking pan.  Pour your mixture in, smooth the surface and bake in a 325/165 oven for 40-45 minutes or until the top is golden and starting to pull away from the sides.

Cool.  Cut.  Try not to eat it all in one sitting.

Sunday 12 September 2010

Black Forest Brownies


This time of the year is my absolute favorite!  The days still have lingering sunshine and pleasant temperatures, but a cooler crisper air now allows for the comfort of fuzzy cardigans, favorite jeans and the excuse to eat big bowls of soup and buy cute new autumn boots.  I absolutely love the first hints of autumn colors- even if they are just in clothing stores.  Autumn colors and trends of any kind always take their lead from the changing colors of the trees as well as the autumnal harvest; pumpkins and squash and apples all doused in cinnamon (or green chile if you live in New Mexico).  Autumn is a season of anticipation for me.  Growing up it was the anticipation of going back to school, starting something new.  Now it's the anticipation of my favorite color and flavor palate.  Autumn is my favorite time of year to eat.

Autumn brings Rosh Hashana- Jewish New Year, and Yom Kippur- a day of atonement.  These holidays revolve around the food cooked for them, even if one of them focuses on a long fast (as Jews we are always preparing for the next meal, and my form of fasting has always pretty much been just those few hours in between meals).  Autumn also brings Halloween, a holiday nearest and dearest to my heart which not only allows you to step outside yourself by dressing up, but exalts both the pumpkin and the apple- what could be better? 

Autumn for me brings the anticipation of Thanksgiving- by far my favorite holiday of them all.  This time of year is about cozying up with family and friends and cooking for the people you love with some of the richest natural flavors possible.


I promise you (and me) any itch for a butternut squash/pumpkin/apple/spice recipe will surely be scratched over these next few glorious months.  Just not today.  I too am trying to develop the art of building anticipation...

I am however in serious need of comfort food.  This adulthood thing, it's hard.  And not just hard like 'wow that math test last week was hard'.   Adulthood can sometimes be the kind of hard that you just can't study for.  And it times like these, it's good to have a recipe on hand for Black Forest Brownies.


The history of the American Brownie goes a little something like this:


The brownie first appeared in public during the 1893 Columbian Exposition, held in Chicago, Illinios. A chef at the city's Palmer's House Hotel created the confection after Bertha Palmer requested a dessert for ladies attending the fair; it should be, she said, smaller than a piece of cake and easily eaten from boxed lunches. These first brownies featured an apricot glaze and walnuts, and they are still being made at the hotel according to the original recipe

There are two major schools of thought when it comes to the texture of the brownie; either dense and fudgey or cakey.  Culinary historians have traced the first cake brownie to the 1906 edition of The Boston Cooking-School Cook Book, edited by Fannie Merritt Farmer. This recipe is an early, less rich and chocolaty version of the brownie we know today, which only used two squares of melted Baker’s chocolate. We don’t know if Fanny Farmer obtained the recipe from another source, printed it as is, adapted it, or provided the name.  As the recipe evolved people started adding more chocolate and more eggs to create a denser fudge consistency like many of us know (and LOVE) today.  While the first brownie recipes were published and variations began to evolve in the first years of the 20th century, it took until the 1920's for the brownie to really catch on and become the delicious and exalted baked good it is today.


Now, let me tell you a bit of history behind this particular brownie recipe.  The original recipe was for 'White Chocolate and Raspberry Brownies' and comes from the cookbook put out my my old temple in Cleveland, compiled recipes from congregants.  I however have never been a huge fan of white chocolate so I have adapted this recipe over the years to suit my tastes.  I should also add that while I will be using a slightly modified (and secret) version of this for an amateur 'brownie bake-off' next month!  Winner (fingers crossed) gets a 6 month supply of chocolate (I wonder if they're prepared for what my husband and I consider that to be...).  Here is the version I made today to remind me of home:

Black Forest Brownies

½ cup unsalted butter
2 cups chocolate chips (I used a combination of dark and milk chocolate)
½ cup sugar
1 cup plain white flour
2 eggs
½ tsp vanilla
pinch salt
2/3 cup cherry jam

Preheat the oven to 325C/ 155F.  Grease a square 8” or 9” pan.

In a small pot over the stove melt your butter.  Add to it 1 cup chocolate chips but DO NOT STIR.

In a large bowl whip eggs until fluffy.  Add sugar and mix at a high speed until the color is lemony and sugar is combined.  Add melted butter/chip mixture at a low speed, followed by flour, vanilla and salt.

Pour 2/3 of your chocolate batter evenly into your pan and bake for 10-12 minutes.  Meanwhile on a low heat melt your jam until it is very thin and liquidy, taking care to continuously stir it so it does not bubble or burn.

Pour heated jam onto your baked brownie, making sure to evenly cover the surface area.

Stir your remaining chips into your reserved brownie batter and dollop evenly onto your baked brownies.  Some jam will show through- don't worry it will look beautiful!

Bake for 20-25 minutes or until a tester comes out clean.  Take care not to over bake, this will dry your brownies out leaving you with no choice but to cover in ice cream before eating... not always a bad thing I suppose...


Saturday 4 September 2010

Quintessential British Eating; The Sunday Roast

As an American anthropologist living abroad in London I have been on the never-ending quest to identify and define distinct elements of British culture. Though I have lived in London now for four years, and have adjusted very well by now to both the London and the British way of life, I am always reminded of the changes whenever I return to the states to visit, or receive a visit from American friends and family.

I have in the past year made the switch in career paths from arts anthropologist to culinary anthropologist, and have become even more interested in embarking on a quest to discover truly British food customs and recipes. What I have enjoyed doing, and continue to do is recognise these cultural food icons, and then recreate them to incorporate my American background. I have begun doing so using such cultural practices afternoon tea, salty Scottish porridge, scones, and now the Sunday Roast.

In short, the origins of the 'Sunday roast' are as follows; In medieval times the village serfs or peasants served the squire for six days a week. Sundays however were a day of rest, and after the morning church service the squire would reward them for their hard work during the week with a meal, often consisting of roasted oxen. The Sunday Roast was born, and today while no longer oxen, is still a mainstay in British families and pubs all over the country.

I, a former vegetarian for nearly 10 years, am determined to master the art of the perfectly roasted chicken. Roasted chicken for me, given my Jewish heritage, is an important feature in my cultural upbringing. Roasted chicken is known to often make its appearance at the Friday night Shabbat family dinner table. It's bones are used later to make the stock for matzah ball soup, chicken noodle soup etc. In this recipe I married the great traditions of both the British roast and the Jewish roasted chicken, with my love of the Southwest flavours of the United States. I bring you, Pasilla Chili Roasted Chicken.

Pasilla Chilli Roasted Chicken
Serves 6

Ingredients:

2 tbsp Demorara sugar
1 tsp Pasilla chili powder
2-3 tsp olive oil
1x 2kg free range fresh chicken
1 lemon
1 whole onion
salt and pepper to taste

Method:

Pre-heat your oven to 170C.

In a small bowl combine sugar, chili powder and olive oil until you have made a thick and grainy paste. You can add more olive oil if you wish, it won't hurt.

Wash chicken and pat dry with a paper towel. Insert the whole onion and ½ the lemon into the chicken's cavity. Sprinkle the skin of the chicken with sea salt and rub in. This will help you to create a crispier chicken skin by helping to drain the moisture out of the skin.

Generously cover the chicken in the sugar/chili paste, making sure to coat the chicken completely by rubbing the paste in with your fingers (my preference always- I'm a messy cook) or a pastry brush.

Place the chicken into a roasting pot, large enough that you will be able cover the pot with a lid half way through the cooking time.

Place the chicken uncovered into the oven for 45 minutes.

After the 45 minutes of cooking time is up, cover the chicken with the lid and cook for another 40 minutes or until the juices from the bird run clear.

Remove the bird from the oven and rest for a minimum of 10-15 minutes.

Enjoy with your favorite accompaniments and later on as leftovers

Tuesday 24 August 2010

How to Use Up a Jug of Buttermilk...

Where has the summer gone?  As I sit here at my desk, window open and consequently sweatshirt on, I am nothing short of impressed that the summer has disappeared so quickly and it will soon be September once again. 

Not that summer wasn't good to me.  I discovered a few new cool markets I had never visited before, spent some lovely Saturday afternoons in the park with a book and my husband, went back to Spain for a short time (a country I absolutely love but hadn't been back to visit in nearly 10 years!), and just recently closed the chapter on my 20's- all wonderful things...  However signs of autumn have somehow seemed to creep up on me just as quickly and quietly as the expiration date for this jug of buttermilk.  One day it seemes ages away and the next day you realise you have to make the most of it before it's gone!

So, make the most I did. 

First, I made biscuits.  Not British biscuits.  American biscuits.   Made with buttermilk, spring onions (scallions) and sea salt.

Originally, buttermilk was the liquid left behind after churning butter out of cream, hence the name. It also refers to a range of fermented milk drinks, common in warm climates (e.g. Middle East, India, or the Southern United States) where fresh milk would otherwise sour quickly.  It is why in American culture, buttermilk has such ties to Southern cooking; buttermilk biscuits, buttermilk pancakes, red velvet, buttermilk fried chicken etc.  (My mouth is now watering uncontrollably.)

These buttermilk biscuits are truly worth making.  My first instinct was to leave the spring onions out all together, but adding them really enhanced the flavor of the biscuits.  Plus the small amount of cornmeal made the recipe feel homey and wholesome- like cookies fresh out of the oven.  Eaten warm with a small pad of melting butter would surely be enough to help anyone welcome in the first signs of autumn with open arms and a cozy sweatshirt.

Buttermilk Biscuits with Green Onions, Black Pepper, and Sea Salt

Bon Appétit  | November 2008
  • 3/4 cup chilled buttermilk
  • 1/2 cup finely chopped green onions
  • 2 cups self-rising flour
  • 1/2 cup yellow cornmeal
  • 3 tablespoons sugar
  • 1/2 teaspoon coarsely ground black pepper plus additional for sprinkling
  • 1/2 cup (1 stick) chilled unsalted butter, cut into 1/2-inch cubes, plus 1 tablespoon melted butter
  • Coarse sea salt

Method:
 
Position rack in center of oven and preheat to 425°F/200 C . 

Line baking sheet with parchment paper. 

Combine buttermilk and green onions in medium bowl. Whisk flour, cornmeal, sugar, and 1/2 teaspoon ground black pepper in large bowl to blend. Add 1/2 cup chilled butter and rub in with fingertips until mixture resembles coarse meal. Add buttermilk mixture and stir until moist clumps form. 

Gather dough together. Turn dough out onto floured surface and knead gently just to combine, about 3 to 4 turns. Roll out to 3/4-inch thickness. Using floured 2-inch cookie or biscuit cutter, cut out rounds. Reroll scraps and cut out additional rounds. 


Place 2 inches apart on prepared baking sheet. Brush tops of biscuits with melted butter. Sprinkle each lightly with coarse sea salt and ground black pepper. 
Bake biscuits until golden and tester inserted into center comes out clean, about 20 minutes. Cool slightly. Serve warm or at room temperature.


Or I suppose if that kind of thing doesn't tickle your fancy you could always make a pie.

Turns out I did that too...


Buttermilk Pie
Adapted from Joy the Baker


3 large eggs
1 cup sugar
2 tablespoons all-purpose flour
1 stick melted butter, slightly cooled.
1 cup buttermilk
2 teaspoons pure vanilla extrct
1 unbaked 9-inch pie shell (I used a pre-made puff pastry sheet but really you should make your own I suppose... shortcrust would work equally as well)


Beat eggs slightly. Mix sugar and flour well and add to the eggs. Mix until creamy. Add melted butter, mixing well. Add buttermilk and vanilla extract. Bake at 325F/165C degrees for 45 minutes to 1 hour until the custard sets.

The custard will still jiggle a bit in the oven even when it’s set. Just make sure that the middle does not jiggle a lot more than the sides. That means it needs more time.

Let the pie cool down to room temperature.  You can either serve it at room temperature or chill it.  It's a beautiful balance between custard and cheesecake and would work perfectly served with fresh fruit. 


Turns out I spent August in the kitchen.  No wonder it went by so quickly!

Sunday 1 August 2010

Absence Makes the Heart Grow Fonder

 It has been WAY too long since I've been back here.... so many discoveries have happened since; Rick Bayless's chilli (twice- once with turkey mince and once with pork mince) and kohlrabi (a bulbous looking vegetable I had never seen, eaten, nor used before but now love) and quite a lot in between.  I don't have a lot of 'anthropology of...' for either one of these meals that was made, but wanted to share the adventures of them all the same, and encourage anyone to make both!

First the kohlrabi.  Nick and I for the past two months or so have been receiving our vegetables and fruits via a 'veg box' delivered to us weekly from Riverford farm.  The produce are all organic, and well over 75% of the fruit and veg are sourced from local farms.  The great news is knowing we're supporting farms and farmers, rather than air travel and large chain grocery stores, plus it's an adventure and a challenge to work with whatever ingredients they are able to provide you with for the week (like kohlrabi).  The not so great news sometimes is that you don't get to choose what you get each week- so if you have a craving for eggplant parm, well you just have to wait for eggplants (aubergines) to be in season.  Thankfully I have rarely met a fruit or vegetable I don't like, though I am getting a bit tired of apples each week and will most likely have to give up the ghost and cheat by cooking most of them down into a sauce, rather than use them a bit more creatively.

"Kohlrabi" is a German word adopted without change into the English language. Kohl meaning cabbage and 
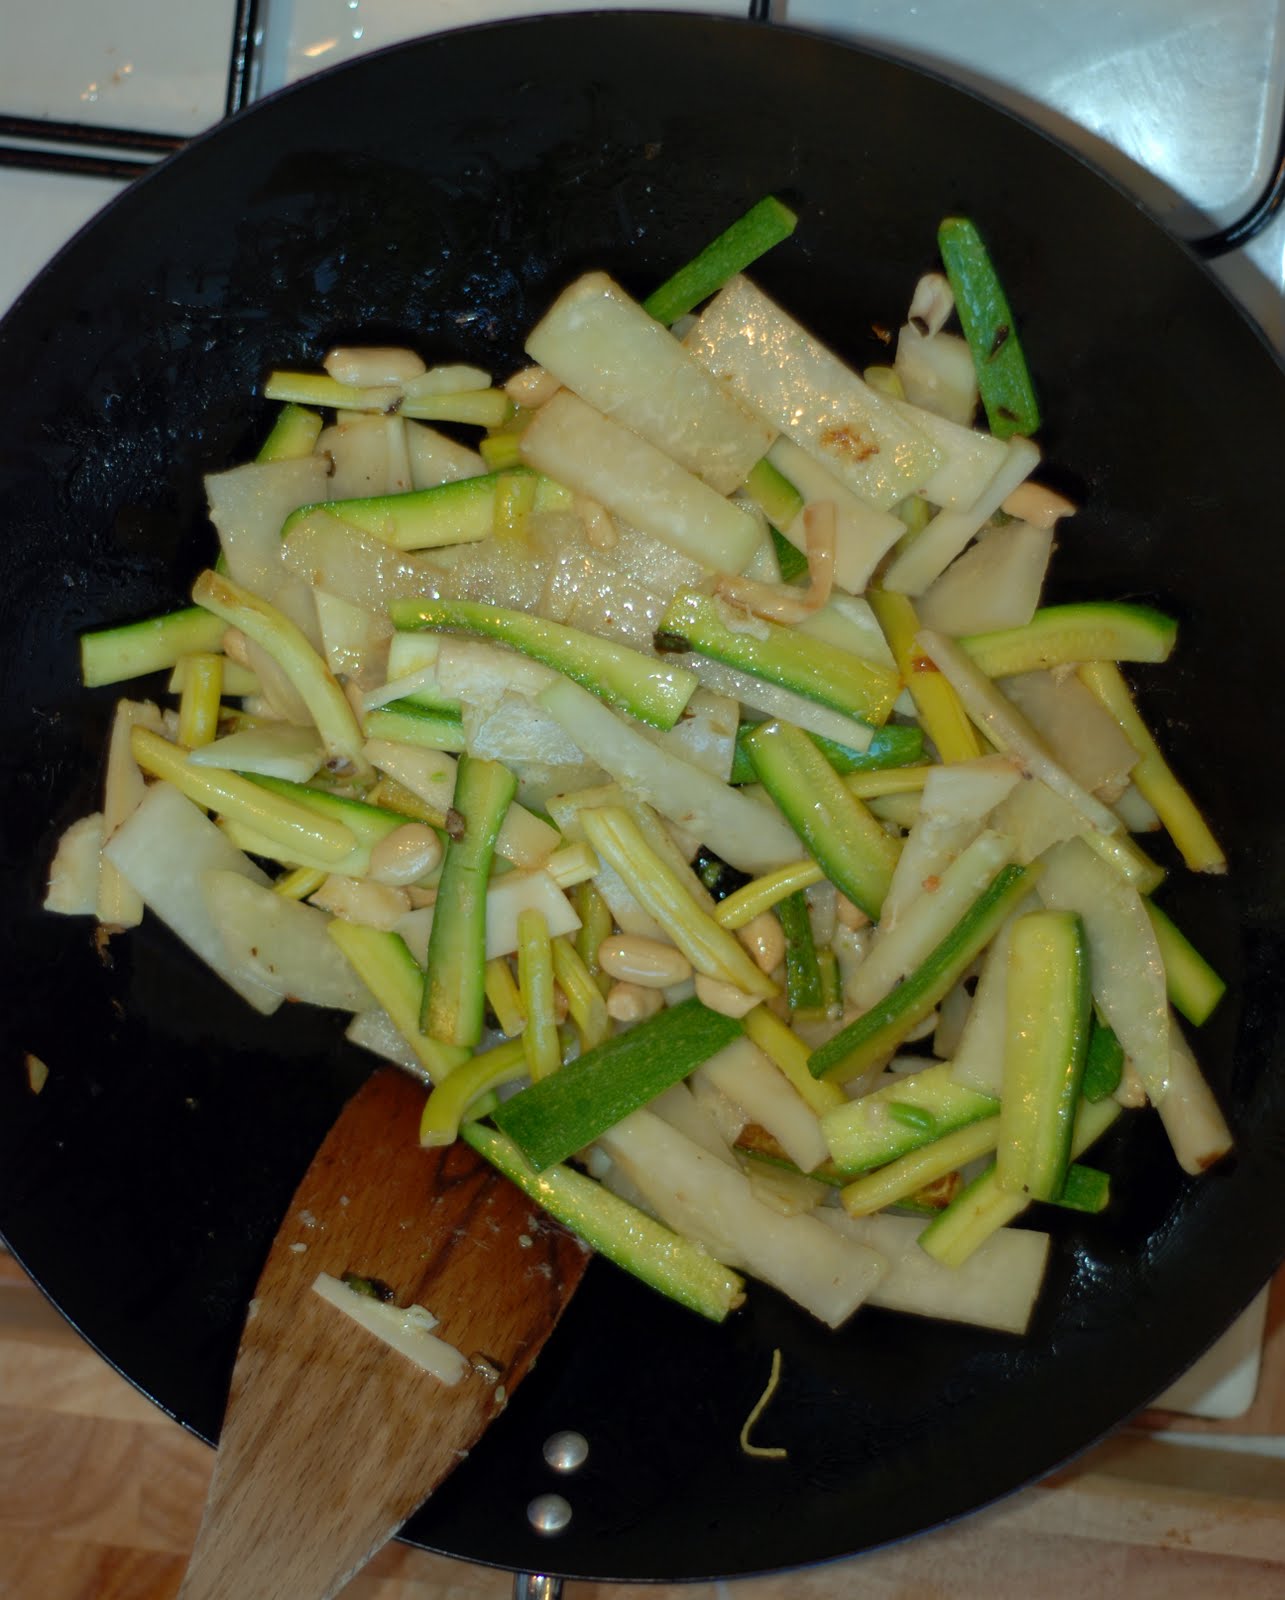
Rabi meaning turnip. This "cabbage" with a turniplike enlargement of the stem above ground was apparently developed in northern Europe not long before the 16th century.  It's flavour is similar to a turnip, but much lighter, with a texture similar to a dense water chestnut or an english breakfast radish (the pink ones).  In fact I used it in a similar fashion to a water chestnut and popped about 1/2 of it, thinly sliced, into a stir-fry.  I loved it!  It has a mild sweetness and a crunch that I found refreshing.  With stir-fries like these there are no exact recipes I ever use- it's always based on what veggies are in the fridge, combined with stir-fry staples like sesame oil, soy sauce, a chilli or two, hoisin sauce or oyster sauce, and maybe some corn flour/starch to thicken up the sauce.  I also really like squeezing some lime juice over it all at the end for a bit of sharpness.  The kohlrabi was delicious and as the veggies were only cooked for a few minutes, everything was still crisp.

Then last week I moved onto a different culture and had a go with tex-mex, all thanks to two packages of minced turkey and pork I had in the freezer, dried ancho chillies in the cupboard and recipe from Rick Bayless.  His chilli recipe, as opposed to others I've seen is very simple and straight forward and really highlights the flavors of the ancho chillies, as opposed to others that call for so many ingredients (molasses, beer, coffee etc.).  This recipe was about two things- the meat and the anchos- and it was absolutely delicious!  There is however quite a controversy of acceptable ingredients based on the schools of 'Texas' chilli, where it is believed chilli originated, and well, others...

Beans or no beans?  Beef was plentiful and cheap in San Antonio- one of the larger cattle towns in Texas that was home to 'chili parlors', family run successful businesses which started pre-WWII in Texas.  Each of these businesses claimed to have a 'secret recipe' setting it apart from all the rest.  With the ingredients both economical and filling, these businesses were a huge success and became very popular.  Eventually these 'chili parlors' moved north and east, into areas where beef was more expensive and beans were added to fill out the dish and to keep the costs within reason.  It is why even today (and proof being in Rick's 'optional bean' recipe) there are still a few schools of thought on the proper ingredients for chilli.  Me personally, having only been a non-vegetarian for a little over a year, I am not a staunch believer that chilli can be only one way, one kind.  But I also didn't grow up in Texas...

Here's what Rick likes, and I don't blame him!

Ingredients

4 large (about 2 ounces) ancho chiles, stemmed, seeded and torn into large pieces
    OR 3 tablespoons pure ground ancho, New Mexico or California chile
2 tablespoons bacon drippings, vegetable oil or olive oil
1 1/2 pounds ground beef, ground pork or a mixture of the two
1 medium onion, cut into 1/4-inch pieces
3 garlic cloves, peeled and halved
1 15-ounce can diced tomatoes (preferably fire-roasted)
1 teaspoon ground cumin
Salt
2 tablespoons masa harina (the flour used to make corn tortillas) or corn meal *I didn't think this was needed as the chilli was quite thick on its own*
One 15-ounce can pinto beans
About 1 cup grated cheddar or Monterey Jack cheese, for serving
3 green onions, cut crosswise into 1/4-inch pieces, for serving
 Directions
1.  Toast and soak chiles.   Heat large deep skillet or a large heavy pot (like a 6- to 9-quart Dutch oven) over medium. When hot, toast chiles one by one: open flat and press down with spatula until chile releases aroma and toasts lightly - 10 to 15 seconds.  Flip and toast other side same amount of time.  Transfer to a small bowl. When all are done, cover with hot tap water and lay a plate on top to keep the chiles submerged. 

2.  Brown meat and onion.   Raise heat under pan to medium-high.  Add bacon drippings or oil, then add the meat and onion.  Break up meat with spoon or spatula as it cooks and browns—total cooking time about 10 minutes. Remove from the heat.  If there is lots of rendered fat, tip it off and discard.

3.  Make seasoning.   Drain chiles, discarding water.  Place in food processor fitted with steel blade.  Add garlic, tomatoes with their juices and cumin.  Secure lid and process until smooth. Set medium-mesh strainer over meat pot.  Pour in chile mixture and press through.

4.  Simmer chile.   Return pan to medium-high heat.  Stir 5 minutes to cook chile mixture.  Stir in 2 cups water and 1 1/2 teaspoons salt. Reduce heat to medium-low.  Simmer 45 minutes. 

5.  Finish and serve.   Sprinkle corn meal or masa harina over chili and stir. Stir in drained beans if using.  Simmer 5 minutes.  Taste and season with more salt if you think necessary.  Ladle chili into bowls. Scoop cheese and green onion into small serving bowls. Pass separately for guests to add as much as they want.


 Whew!  All caught up now.

Sunday 11 July 2010

A belated independence


So I'm about a week late, but I was just too busy celebrating my independence from the Queen and rebuking her tea tax by um, well making iced tea and taking walks in her parks.... it's a proper summer in London, what's a girl to do?

Make apple pie!  Because what is more American than apple pie right?  Actually, I have something to tell you.  I kind of feel like I'm about to tell you Santa doesn't exist but as a cultural anthropologist and a food lover I have to come clean.  Apple pie is not American.  I know.  I'm sorry. 

There are records of apple pie recipes that date back to 1381, clearly before the good old US of A declared it's independence.  Even worse yet, while the origins are not perfectly clear it is probable that apple pie originated in either England or Holland/Netherlands.  That being said there were no apples in the Americas before the landing of Columbus, so while the origins of the apple pie are not American, there is certainly a connection between the discovery of the 'new world' and the fruit itself.

It seems that the real origins of the patriotism behind the pie was created by powerful marketing.  Advertisers in the 1970's exploited the patriotic connection with the commercial jingle "baseball, hot dogs, apple pie and Chevrolet". There are also claims that the Apple Marketing Board of New York State used such slogans as "An apple a day keeps the doctor away" and "as American as apple pie!", and thus "was able to successfully 'rehabilitate' the apple as a popular comestible" in the early twentieth century when prohibition outlawed the production of cider. 

Also upon further research I have discovered that 'American as apple pie' was actually the shortened version of 'As American as motherhood and apple pie', clearly developed to create a wholesome and family oriented effect.  Given the ridiculousness of that statement I can see why it was so quickly shortened...

So I added to the classic 'American' apple pie by creating a British/American fusion with a punnet of gooseberries- a tart grape-like looking fruit found in Britain, Europe and parts of Africa and Asia.  I think in the future I would bake the pie for a bit longer, as the gooseberries were very tart!  But, it was patriotic I thought, and fun to make the pie- and we ate it following a dinner of bbq ribs and corn on the cob.  No doubt our forefathers would have done the same!  

  • 4 cups (1 L) green Ontario Gooseberries
  • 2 cups (500 ml) thinly sliced and peeled Ontario New Apples
  • 1 cup (250 ml) granulated sugar
  • ¼ cup (50 ml) all-purpose flour
  • Pinch salt
  • Pastry for 9 in. (23 cm) double-crust pie
  • 1 tbsp (15 ml) butter
  • Milk
Top and tail gooseberries; combine with applies in large bowl. Reserve about 1 tsp (5 ml) sugar; combine remaining sugar with flour and salt. Mix well with fruit; set aside.

On lightly floured board, roll out just over half the pastry. Without stretching it, fit into 9 inch (23 cm) pie plate. Spoon in gooseberry mixture and accumulated juices. Dot with butter. Roll out remaining pastry. Moisten rim of bottom shell with water. Cover with top pastry. Tuck edges under and crimp to seal.

Brush top with milk, avoiding crimped edges. Sprinkle with reserved sugar. Bake in 425F (220C) oven for 15 minutes. Reduce heat to 375F (190C) and bake for 25-30 minutes longer or until crust is golden brown and filling is bubbly.